The Big Problem With Making Art
Do you want to make cool art? Many people try to make art but get stuck. They think they need fancy tools or lots of skill. They feel sad when their art does not look good.Making woodcut prints feels hard for most people. They worry about cutting wood. They don’t know what tools to buy. They mess up their prints and waste wood and paper.I see this all the time! People buy the wrong wood. They use dull tools. Their ink is too thick or too thin. The prints look bad. They give up.But I can help you fix all these problems! I’ll show you easy ways to make amazing woodcut prints. You’ll learn what wood to buy, what tools work best, and how to print without mess.
What You Need to Make Woodcut Prints
Let’s get the right stuff first! Here’s what you need:
Wood Types You Can Use
| Wood Type | How Hard | Good For | Cost |
|---|---|---|---|
| Shina Plywood | Medium | Beginners | $8 – $15 |
| Birch Plywood | Medium | Saving money | $5 – $12 |
| Basswood | Soft | Easy cutting | $10 – $18 |
| Pine | Soft | Big areas | $4 – $10 |
I like Shina plywood best for new people. It cuts easy but won’t break. The grain won’t mess up your art.
Tools You Must Have
You need these basic tools:
- V-gouge for making lines
- U-gouge for taking out big parts
- Knife for small cuts
- Brayer (roller) for ink
- Baren or spoon for pressing paper
New to this? Buy a beginner set for $25-60. It has all you need to start.
Step 1: Make Your Design
First, think what you want to show in your art. Simple is best when you start!Keep in mind that parts you cut away will be white in your print. Parts you leave will be black (or the color of your ink).You can:
- Draw right on the wood
- Draw on paper first, then put it on wood
- Use carbon paper to copy a drawing
Remember: Your print will come out backwards! This matters if you have words or faces in your art.
Step 2: Get Your Wood Ready
Got your wood? Let’s make it nice for cutting:
- Sand the top smooth
- Wipe off all dust
- Put your drawing on top
For putting your drawing on wood, try this easy way:
- Draw on paper
- Flip paper face down on wood
- Rub back with spoon
- Lift paper to see if marks show
- Go over lines with pen
Now your wood has your drawing and is ready to cut!
Step 3: Cutting Your Wood
This is the fun part! But be careful with sharp tools.Hold your tool like this:
- Grip with your hand
- Keep other hand behind the tool
- Cut away from your body
- Go slow and take breaks
Start with the outline of your design. Then cut away big white areas. Last, add small details.
Tips for Good Cuts:
- Keep tools sharp
- Cut with the wood grain when you can
- Hold wood still on table
- Turn the wood, not your body
- Take little cuts, not big ones
Mess up? Don’t worry! You can glue small bits of wood back in, or just make that part of your design.
Step 4: Ink Your Block
Now the fun part! Let’s add ink:
- Put a small line of ink on a flat surface
- Roll your brayer in the ink until it makes a soft sound
- Roll ink on your wood block
- Make sure ink covers all parts that stick up
Too much ink makes fuzzy prints. Too little ink makes spotty prints. Try for a thin, even layer.
Step 5: Print Your Design
Ready to see your art? Let’s print:
- Put paper on top of your inked block
- Rub the back with a baren or spoon
- Press hard but don’t let paper move
- Slowly peel paper off
- Let print dry flat
Your first print might not look perfect. That’s OK! Try again with more or less ink or pressure.Want to make many prints the same? Make registration marks. Put paper in same spot every time.
Step 6: Try Colors
Want to make colorful prints? You can:
- Use more blocks – Make one block for each color
- Try reduction – Cut more from same block for each color
- Hand color – Paint or color your print after
The reduction method is fun but scary. You print one color, cut more wood away, then print next color on same paper. You can’t go back, so be sure!
How to Fix Common Problems
Things go wrong sometimes. Here’s how to fix them:
| Problem | How to Fix It |
|---|---|
| Wood breaks | Cut slower, sharpen tools |
| Spotty ink | Use more ink or press harder |
| Fuzzy lines | Use less ink or sharpen tools |
| Paper sticks | Let ink dry more between colors |
| Uneven print | Press all areas the same |
Don’t give up if your first print looks bad! Even pros make many tests.
Ideas for Your First Woodcut
Not sure what to make? Try these easy ideas:
- Simple leaf or plant
- Your initials
- Moon and stars
- Cat or dog shape
- House or tree
Start with black and white designs. Add colors later when you feel ready.Want to see how pros do it? Look at work by Albrecht Dürer or Hokusai. Their prints show what’s possible!
Show Off Your Woodcut Prints
Made a print you like? Here’s what to do:
- Let it dry for 2-3 days
- Sign your name and date at bottom
- Number your prints (like 1/10, 2/10)
- Put in a frame or give as gifts
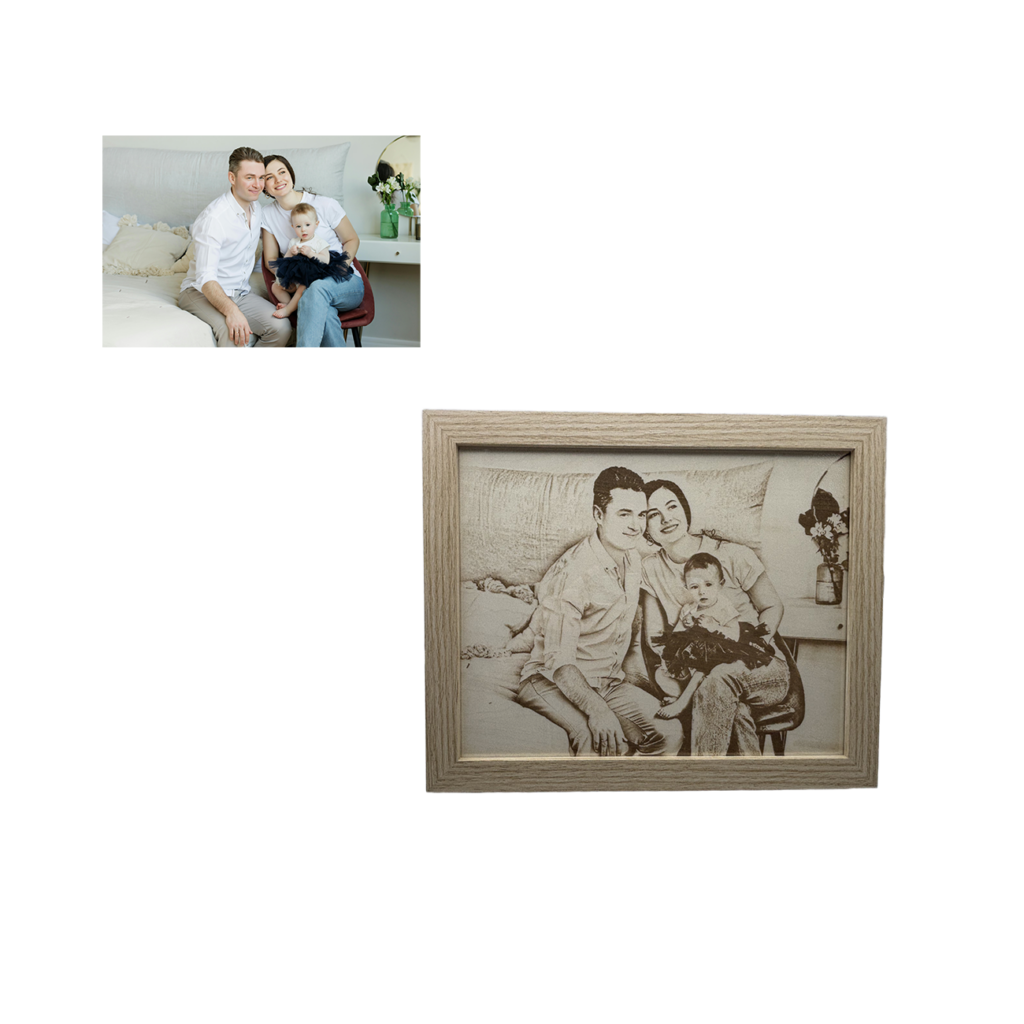
You can also try our Custom Woodcut Painting Photo service if you want to see how your photo looks as a woodcut!
More Fun with Woodcuts
Once you learn the basics, try these cool things:
- Hand-drawn Custom Portrait styles can give ideas for woodcuts
- Make prints on fabric
- Make cards or book covers
- Try Custom Photo Light Painting techniques with your woodcuts
Tools That Help You Learn
Learning takes time. Most people need about:
- 2 hours to make first design
- 3-5 hours to cut first block
- 1 hour to learn inking
- 30 minutes to make prints
Don’t rush! Go slow and have fun.
Why People Love Woodcut Prints
Woodcut prints are special because:
- Each one is a bit different
- They have a warm, hand-made look
- You can make many from one block
- The bold lines look strong
- They connect you to art history
Plus, when you make your own, you feel proud! It’s art YOU made by hand.
Best Papers to Use
The paper matters a lot! Try these:
- Japanese washi paper – Thin but strong
- Masa paper – Good for beginners
- Mulberry paper – Great for hand printing
You can start with any smooth paper. Even copy paper works for tests!
Inks That Work Best
For beginners, water-based ink is best. It cleans up with just water!Oil-based ink makes darker prints but needs special cleaners. Start with water-based, then try oil later.
Woodcut Art Through Time
People have made woodcuts for over 1,000 years! In China, they made the first ones. In Japan, artists like Hokusai made famous wave prints. In Europe, Albrecht Dürer made detailed scenes.Now YOU can join this long art tradition! Your woodcuts connect you to all these artists.
Make Your First Woodcut Today!
Don’t wait to start! Even with simple tools, you can make cool prints today.Woodcut printing helps you slow down and think. Each cut matters. You can’t rush. This makes it good for your mind.Remember:
- Start with easy designs
- Use soft wood
- Go slow when cutting
- Have fun with the process
The best part? Even “mistakes” can look cool in woodcuts!If you love the look but don’t want to make your own, check out our Personalized Memory Keepsake with woodcut-style art.
Start Your Woodcut Journey Now
Got questions? Need help? Want to show off your prints? I’m here to help!With just a few tools and some wood, you can make art that lasts for years. Each print shows YOUR style and YOUR ideas.The best time to start is NOW. Grab some wood, get some tools, and make your first cut. You’ll be so proud when you pull your first print!Happy cutting and printing!
Want to see your photo as a woodcut? Check out our Custom Woodcut Painting Photo service today!